Views: 0 Author: Site Editor Publish Time: 2025-07-03 Origin: Site


You can learn how to brew beer with just a few simple steps. Brewing beer at home feels exciting and rewarding. You gather your equipment, clean everything, then brew your homemade beer. After that, you let it ferment, bottle it, and enjoy your own homebrew. Many people start home beer making because they want to make your own beer that tastes fresh. Homebrewing does not have to feel hard. You just follow the basic steps and enjoy the process. Anyone can create tasty homemade beer right in their kitchen!
Begin homebrewing with a starter kit. The kit has all the basic tools and ingredients you need.
Wash and sanitize your tools very well. This keeps your beer fresh and stops bad tastes.
Follow each brewing step in order. First, prepare your things. Next, brew your beer. Then, let it ferment. After that, bottle it. Last, let your beer condition.
Keep the fermentation temperature between 65 and 72°F. This helps yeast work well and gives good flavor.
Add priming sugar before you bottle your beer. This makes bubbles and gives your beer fizz.
Do not make common mistakes. Always clean your tools. Do not rush the cooling step. Use the right bottles.
Start with easy beer styles like amber ale, pale ale, or brown ale. This helps you get better at brewing.
Join homebrewing groups and use online sites. You can learn, share ideas, and get better at brewing.
Getting started with homebrewing feels much easier when you have the right tools and ingredients. You do not need fancy gadgets. A simple homebrewing starter kit gives you everything you need to brew your first batch of beer. Let’s break down what you need and why each item matters.
A homebrewing starter kit takes away the guesswork. You get all the basic homebrew equipment in one box. Here’s a checklist of what you’ll find in most kits:
You use a brewing kettle to boil your ingredients. Most kits include a kettle that holds at least 5 gallons. This size works well for extract brewing and small batches.
The fermenter is where your beer turns from sweet liquid into something delicious. The airlock lets gas escape but keeps germs out. You want a fermenter that is easy to clean and sturdy.
Sanitizer keeps your homebrewing safe. Clean tools mean your beer tastes fresh. Most kits include a no-rinse sanitizer, so you do not need to rinse after cleaning.
A siphon helps you move your beer from the fermenter to bottles without stirring up sediment. Kits often include bottles or you can save clean bottles from store-bought beer.
Tip: Always check your kit for instructions. Each kit may have small differences.
Most beginners start with extract brewing. This method uses malt extract instead of raw grains. It saves time and makes homebrewing less tricky.
Malt extract is the main sugar source for your beer. It comes as a syrup or powder. You just add it to your kettle and stir.
Hops give your beer flavor and aroma. Kits include pre-measured hops, so you do not need to guess how much to use.
Yeast eats the sugar from the malt extract and turns it into alcohol. You usually get a packet of yeast in your kit.
Good water makes good beer. Use clean, fresh water for the best results.
You can buy a homebrewing starter kit online or at a local homebrew shop. Many shops offer advice and help you pick the right kit. Online stores have reviews and lots of choices. If you want to try extract brewing, look for kits made for beginners.
Note: Ask for help if you feel unsure. Homebrewing communities love to help new brewers.
Keeping your equipment clean and sanitized is the most important step in homebrewing. If you skip this part or rush through it, you might end up with beer that tastes bad or even goes to waste. Let’s talk about why sanitation matters and how you can do it right every time.
You want your beer to taste great. Tiny germs and wild yeast love sugar just as much as brewing yeast does. If they get into your beer, they can spoil the flavor or make your batch undrinkable. Clean tools keep your beer safe and tasty.
Tip: Always clean and sanitize before you touch anything that will touch your beer after boiling. This includes your fermenter, siphon, bottles, and even your hands!
You do not need fancy chemicals or tools. Most starter kits come with a no-rinse sanitizer. Follow these steps every time you brew:
Rinse everything with warm water to remove dust or leftover beer.
Scrub your kettle, fermenter, and bottles with a soft brush. You want to remove any sticky spots or dried yeast.
Use mild dish soap if you see stubborn stains. Rinse well so no soap stays behind.
Mix the sanitizer with water as the label says. Most no-rinse sanitizers need just a small amount.
Soak your equipment in the solution for a few minutes. Make sure every surface gets wet.
Let items air dry or shake off extra liquid. Do not use a towel, as it can add germs back.
Note: Sanitizer works best on clean surfaces. Always clean first, then sanitize.
Many new brewers make the same errors. You can avoid them with a little care:
Forgetting to clean before sanitizing. Dirt blocks sanitizer from working.
Using dirty towels to dry equipment. Air drying is safer.
Touching inside bottles or fermenters with your hands after sanitizing.
Skipping the airlock or not sanitizing it. Germs can sneak in here, too.
Not sanitizing bottle caps or siphon hoses.
If you remember to clean and sanitize every time, you set yourself up for brewing success. Clean gear means better beer, every batch!

Learning how to homebrew beer feels exciting when you follow clear, step-by-step instructions. You do not need to feel overwhelmed. You just need to follow the basic steps and enjoy the homebrewing process. Let’s walk through each part so you can make your own beer at home.
Start by picking a clean, open space for brewing. You want a spot with good airflow and enough room to move around. Clear your counters and wipe down all surfaces. Gather all your equipment before you begin. This helps you stay organized and keeps the process smooth.
Tip: Lay out your brewing kettle, fermenter, spoon, thermometer, and sanitizer. Keep everything within reach so you do not have to search for tools during the brewing process.
Next, measure out your ingredients. Double-check your recipe and make sure you have the right amounts of malt extract, hops, and yeast. Use a kitchen scale or measuring cups for accuracy. Good measurements help your beer taste just right.
Measure malt extract carefully. Sticky syrup can be tricky, so use a spatula to get it all out.
Weigh hops with a small scale if possible.
Check your yeast packet for the right amount.
If your kit includes specialty grains, you will steep them first. Heat water in your brewing kettle to about 150–170°F. Place the grains in a mesh bag and lower them into the water. Let them soak for 20–30 minutes. This step adds color and flavor to your beer.
Remove the grain bag and let it drain into the kettle. Do not squeeze the bag, as this can add bitterness.
Now you will bring the liquid, called wort, to a boil. Turn up the heat and watch closely. Once it starts boiling, keep an eye on it to prevent boil-overs. Boiling the wort kills germs and helps blend the flavors.
Note: The boiling process usually takes 60 minutes. Stay nearby and stir often.
After the wort starts boiling, add your malt extract. Stir slowly so it dissolves and does not burn at the bottom. Once the extract is mixed in, you will add hops. Most recipes tell you when to add hops during the boil. Some go in at the start, others near the end for aroma.
Add malt extract off the heat to avoid scorching.
Stir well before returning to a boil.
Follow your recipe for hop timing.
When the boil is done, you need to cool the wort quickly. Fast cooling helps prevent germs from getting in and makes the process safer for yeast. You can use an ice bath in your sink or a special wort chiller.
Place the kettle in a sink filled with ice water.
Stir gently to help the wort cool faster.
Wait until the temperature drops to about 65–75°F.
Once the wort cools, pour it into your sanitized fermenter. Sprinkle the yeast on top. Some yeast packets say to stir, while others do not. Check the instructions on your yeast.
Tip: Make sure everything that touches the cooled wort is sanitized. This keeps your beer safe.
Seal the fermenter with the lid and attach the airlock. The airlock lets gas escape but keeps germs out. Place the fermenter in a dark, cool spot. Avoid direct sunlight and big temperature swings.
Temperature control is key for good homebrewing. Most yeast works best between 65–72°F. Too hot or too cold can make your beer taste strange. Use a stick-on thermometer if you have one. Check the temperature every day.
Pro Tip: If your space gets too warm, wrap the fermenter with a damp towel or move it to a cooler area.
The fermentation process usually takes 1–2 weeks. You will see bubbles in the airlock as the yeast works. When the bubbles slow down, your beer is almost ready for bottling.
You just finished the main steps of how to brew beer at home. The whole process, from start to finish, takes about 2–4 weeks. Homebrewing gives you the chance to learn, experiment, and enjoy fresh beer you made yourself.
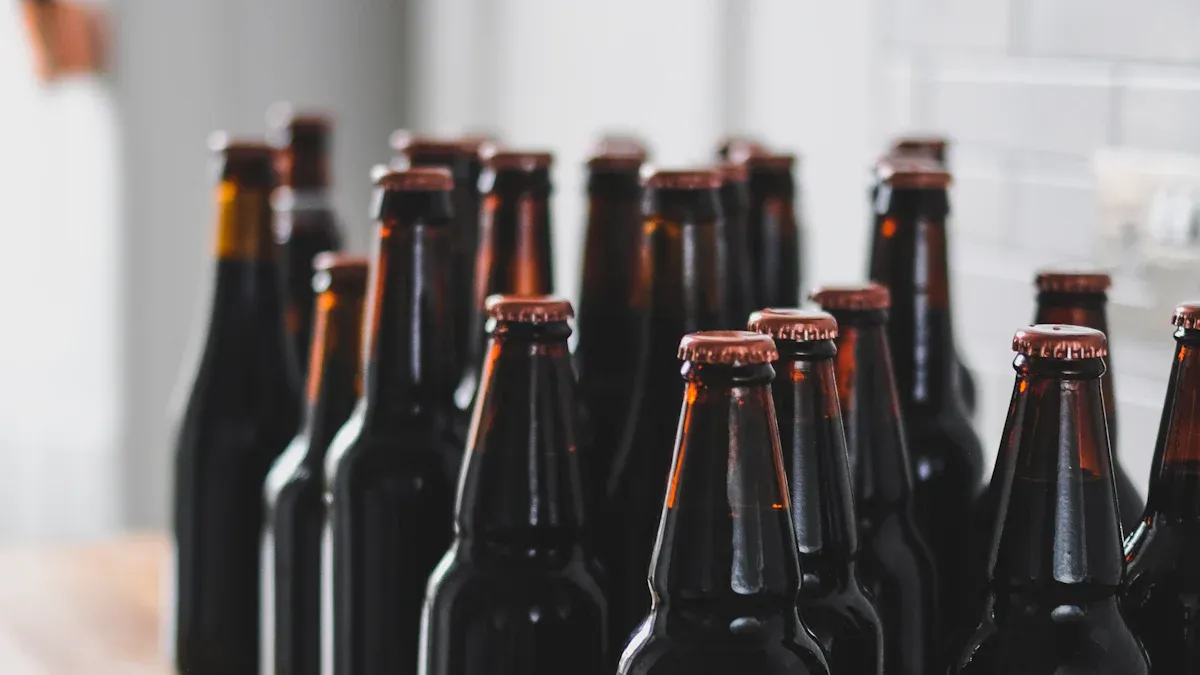
After fermentation, your beer needs a final step before you can enjoy it. Bottling and conditioning help your beer get fizzy and ready to drink. This part feels exciting because you get to see your hard work pay off.
Priming sugar gives your beer bubbles. You add a small amount of sugar right before bottling. The yeast eats this sugar and makes carbon dioxide. This gas stays in the bottle and gives your beer its fizz.
How to use priming sugar:
Measure the right amount of sugar. Most recipes use about 2/3 cup of corn sugar for 5 gallons of beer.
Boil the sugar in a cup of water for a few minutes. This step makes sure the sugar is clean and safe.
Cool the sugar water. You do not want to add hot liquid to your beer.
Pour the sugar water into your clean bottling bucket.
Siphon your beer from the fermenter into the bottling bucket. The sugar mixes in as the beer flows.
Tip: Mix gently. You want the sugar to spread out, but you do not want to stir up sediment.
Now you get to fill your bottles. This step feels rewarding because you see your beer almost ready to drink.
Steps for filling bottles:
Use a sanitized siphon or bottling wand. This tool helps you fill bottles without making a mess.
Place the wand in the bottom of each bottle. Let the beer flow until it reaches about one inch from the top.
Remove the wand. The space left at the top is called "headspace." It helps with carbonation.
Place a sanitized cap on each bottle. Use a bottle capper to seal them tight.
Note: Always check that your bottles and caps are clean and sanitized. Dirty bottles can ruin your beer.
Your beer needs time to get fizzy. This stage is called conditioning. The yeast eats the priming sugar and makes bubbles inside the sealed bottles.
What to do next:
Store your bottles in a dark, room-temperature spot. A closet or cupboard works well.
Wait about 2 weeks. Some beers need a little longer, so be patient.
After 2 weeks, chill a bottle and open it. Listen for the "psst" sound. That means you did it right!
Step | What You Do | Why It Matters |
|---|---|---|
Add priming sugar | Gives yeast food for bubbles | Carbonation happens |
Fill bottles | Moves beer into bottles | Prepares for storage |
Cap bottles | Seals in the CO₂ | Keeps beer fresh |
Wait to condition | Lets bubbles form | Beer gets fizzy |
Tip: Share your first bottle with friends. Celebrate your brewing success!
You just finished bottling and conditioning your beer. Soon, you will taste your own homemade brew. Enjoy the moment—you earned it!
You want your first homebrewing experience to go smoothly. Here are some tips that help you make great beer every time:
Read your recipe all the way through before you start. This helps you understand each step in the process.
Keep a notebook. Write down what you do, how things look, and how your beer tastes. You can use these notes to improve your next brew.
Use fresh ingredients. Old hops or stale malt extract can change the flavor of your beer.
Watch your temperatures. Yeast likes a certain range. Too hot or too cold can slow down the process or give your beer strange flavors.
Taste your beer at different stages. You learn a lot by noticing how flavors change during the process.
Tip: Try to relax and have fun. Homebrewing is a hobby, not a test!
Many beginners make the same mistakes. You can avoid them if you know what to watch for:
Skipping the cleaning step. Dirty tools can ruin your beer.
Not following the recipe. Guessing amounts or times can mess up the process.
Rushing the cooling step. Hot wort can attract germs if you wait too long.
Opening the fermenter too often. You let in air and risk spoiling your brew.
Using the wrong bottles. Some bottles break under pressure. Always use bottles made for beer.
⚠️ Note: If you make a mistake, do not worry. Every homebrewer learns by doing.
Sometimes things do not go as planned. Here is a quick table to help you solve common homebrewing problems:
Problem | What You See | What to Do |
|---|---|---|
No bubbles in airlock | No activity after 48h | Check if the lid is sealed tight. Wait a bit longer. |
Beer tastes sour | Funky or off flavors | Review your cleaning process. Sanitize better next time. |
Flat beer | No fizz after 2 weeks | Make sure you added priming sugar. Store bottles warmer. |
Cloudy beer | Hazy look | Let bottles sit longer. Chill before pouring. |
Tip: If you get stuck, ask for help in a homebrewing group. People love to share advice.
You will get better with each brew. The process gets easier, and your beer will taste better every time you try.
You want to start with the simplest homemade beer. You do not need fancy skills or rare ingredients. You just need a few easy homebrew recipes and a little patience. Let’s look at how to make beer with styles that work well for beginners.
You can try these three classic recipes. Each one uses basic steps and ingredients. You will learn how to make beer that tastes great and feels rewarding to share.
Amber ale gives you a rich color and a smooth taste. You use malt extract, a small amount of hops, and a clean yeast. This style works well as your first homemade beer recipe. You get a balanced flavor that is not too bitter or too sweet.
Basic steps:
Steep a small bag of specialty grains in hot water.
Add malt extract and bring to a boil.
Add hops at the start and near the end of the boil.
Cool the wort, add yeast, and let it ferment.
Bottle and wait for carbonation.
Tip: Amber ale hides small mistakes. You get a forgiving brew that still tastes good.
Pale ale is one of the simplest homemade beer styles. You get a crisp, refreshing taste with a little more hop flavor. This recipe lets you see how to make beer with a bright, golden color.
What you do:
Use light malt extract for a clean base.
Add hops in two stages for flavor and aroma.
Ferment at a steady temperature.
Bottle and let it condition for two weeks.
You can enjoy this homemade beer with pizza or burgers.
Brown ale brings a nutty, smooth flavor. You use darker malt extract and a touch of roasted grains. This style is another great choice for the simplest homemade beer.
Steps:
Steep roasted grains for color and taste.
Add malt extract and boil with mild hops.
Cool, ferment, and bottle.
You get a deep color and a mellow finish.
You can make your homebrew recipes unique. Try these simple ways to add your own twist.
You can add orange peel, honey, or spices to your simplest homemade beer. Drop these extras in during the last few minutes of the boil. Start with small amounts and taste as you go.
Note: Write down what you add. You can repeat your best homemade creations.
You can change the hops in your recipes to get new flavors. Try different hop types or add more hops at the end of the boil for a fresh aroma. This helps you learn how to make beer that matches your taste.
You now have a few easy homebrew recipes to try. Pick one, gather your ingredients, and start brewing. You will soon enjoy your own homemade beer.
You finished your first batch of homemade beer. Now you want to get better at homebrewing. Try new recipes and see what flavors you like. Each time you brew, you learn something new. You can change the hops, try different yeast, or add fruit for a twist. Keep a notebook for every batch. Write down what you did and how it tasted. This helps you remember what works best.
You can watch video tutorials to see how other people brew at home. These videos show you each step and give you tips. Some homebrewers share their mistakes and how they fix them. You learn faster when you see the process in action.
Tip: Don’t be afraid to make mistakes. Every homebrewer started as a beginner. You get better with practice.
You have many ways to learn more about homebrewing. Look for online tutorials that explain each step. Some websites have guides for homemade beer and answer common questions. You can find printable checklists, charts, and even calculators for your next batch.
Here are some helpful resources:
Homebrewing websites: These sites have recipes, equipment reviews, and step-by-step tutorials.
Books: Many books give you simple guides and homemade beer recipes.
Forums: Ask questions and read answers from other homebrewers.
Video tutorials: These help you see the brewing process and learn new tricks.
Resource Type | What You Get |
|---|---|
Online tutorials | Step-by-step instructions |
Books | In-depth guides and recipes |
Forums | Community advice |
Video tutorials | Visual learning |
Note: Try different resources. Some people learn best by reading, others by watching.
You do not have to brew alone. Many people love homebrewing and want to help you. Join a local club or an online group. You can share your homemade beer, swap recipes, and ask for advice. Some groups hold tasting events or brewing contests. You meet new friends who enjoy the same hobby.
You can also follow homebrewing pages on social media. People post photos, tips, and even live tutorials. If you have a question, just ask. Someone will answer and cheer you on.
Join a homebrewing club in your town.
Sign up for online forums or groups.
Share your brewing stories and learn from others.
Tip: Celebrate your progress. Every batch you brew makes you a better homebrewer!
When you brew beer at home, you often see recipes with different measurements. Sometimes you find gallons, other times you see liters or cups. You do not need to feel confused. This cheat sheet helps you convert any liquid volume you see in homebrewing.
You want your beer to taste right. Using the correct amount of water, malt extract, or hops makes a big difference. If you use too much or too little, your beer can turn out too strong or too weak. Knowing how to switch between gallons, quarts, pints, and liters saves you from mistakes.
Tip: Keep this cheat sheet near your brewing area. You can check it fast when you need to measure or scale a recipe.
Here are the most common liquid units you will see:
Gallon (gal)
Quart (qt)
Pint (pt)
Cup
Ounce (oz)
Liter (L)
Milliliter (mL)
You can use this table to convert between the most popular units in homebrewing. Just find the number you have, then look across to see what it equals.
Unit | Gallon (US) | Quart | Pint | Cup | Ounce (fl oz) | Liter | Milliliter |
|---|---|---|---|---|---|---|---|
1 Gallon | 1 | 4 | 8 | 16 | 128 | 3.79 | 3,785 |
1 Quart | 0.25 | 1 | 2 | 4 | 32 | 0.95 | 946 |
1 Pint | 0.125 | 0.5 | 1 | 2 | 16 | 0.47 | 473 |
1 Cup | 0.0625 | 0.25 | 0.5 | 1 | 8 | 0.24 | 237 |
1 Ounce | 0.0078 | 0.031 | 0.062 | 0.125 | 1 | 0.03 | 29.57 |
1 Liter | 0.26 | 1.06 | 2.11 | 4.23 | 33.8 | 1 | 1,000 |
1 Milliliter | 0.00026 | 0.001 | 0.002 | 0.004 | 0.034 | 0.001 | 1 |
Note: Most homebrew recipes use US gallons, not UK gallons. Always check your recipe.
1 gallon = 4 quarts = 8 pints = 16 cups
1 liter ≈ 1.06 quarts (just a little more than a quart)
1 cup = 8 ounces
1 pint = 2 cups
Let’s say your recipe calls for 5 gallons of water, but your kettle only holds 3 gallons. You want to cut the recipe in half. You need 2.5 gallons. That equals 10 quarts or about 9.5 liters.
Pro Tip: Use a measuring pitcher with both liters and quarts marked. You will never guess wrong.
You can use these simple formulas if you want to do the math yourself:
1 gallon = 3.785 liters
1 liter = 1,000 milliliters
1 quart = 0.946 liters
1 pint = 473 milliliters
1 cup = 237 milliliters
Keep this cheat sheet handy. You will save time and avoid mistakes every time you brew!
You can start your first batch today. Don’t worry if it’s not perfect. Every homebrewer learns by doing. Celebrate your first brew and share it with friends. You’ll get better with each try.
Remember: Every expert started as a beginner. Practice brings progress!
Try new recipes.
Join a homebrewing group.
Explore more guides and videos.
Enjoy the journey. Your next great beer is just a brew away!
You can brew your beer in about 4 to 6 hours. Fermentation and conditioning take 2 to 4 weeks. Most of your time is just waiting for the beer to finish.
You do not need fancy tools. A starter kit gives you everything you need. You can use your kitchen stove and basic utensils for your first batch.
Yes, you can brew in small spaces. Choose a recipe for a small batch. Make sure you have good ventilation and a spot to store your fermenter.
Don’t worry! Off flavors happen to everyone. Check your cleaning steps and try again. Most problems come from poor sanitation or temperature swings.
Look for fewer bubbles in the airlock. Most batches finish in 1 to 2 weeks. You can use a hydrometer to check if the reading stays the same for two days.
Yes, you can reuse bottles if they are not twist-off. Clean and sanitize them well. Use a bottle capper to seal them tight.
Homebrewing is legal in most places in the United States for personal use. Check your local laws to be sure. You cannot sell your beer without a license.